Create rate limiting rules in the dashboard for a zone
Create rate limiting rules for a zone in Security > WAF > Rate limiting rules.
Create a rate limiting rule
To create a new rate limiting rule:
Log in to the Cloudflare dashboard, and select your account and domain.
Go to Security > WAF > Rate limiting rules.
Select Create rule.
Enter a descriptive name for the rule in Rule name.
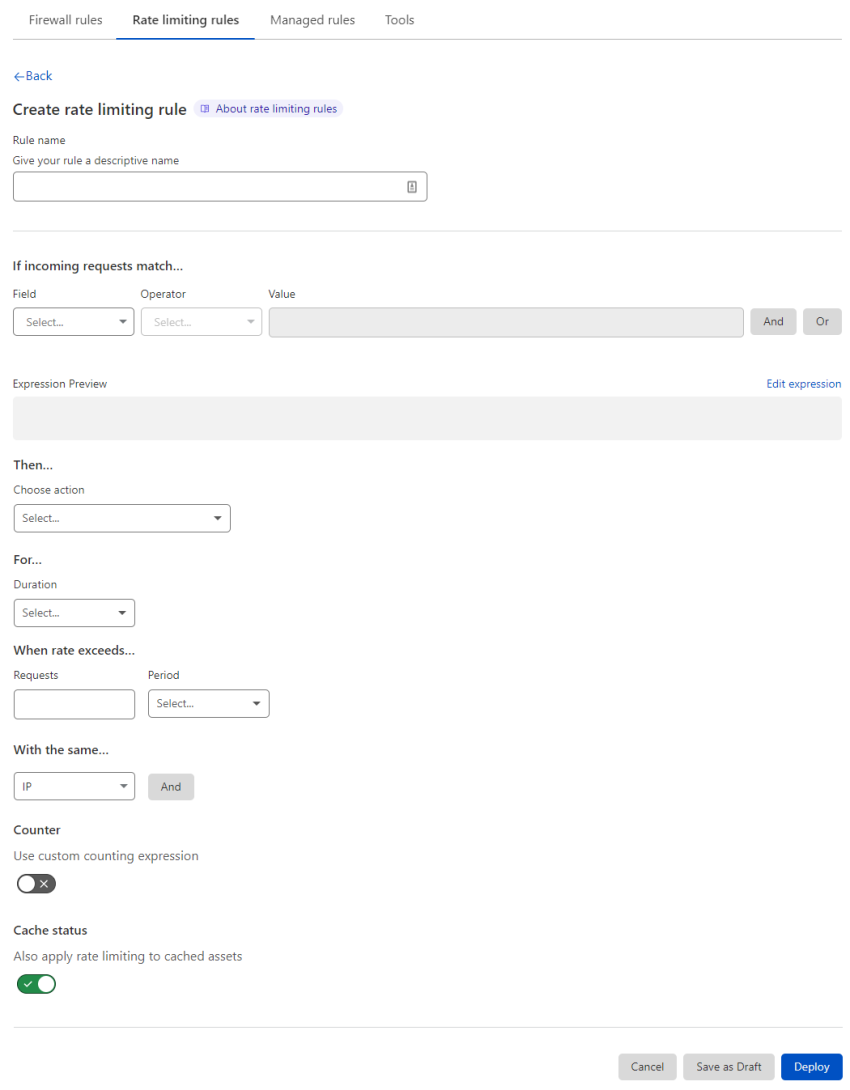
Under If incoming requests match, use the Field drop-down list to choose an HTTP property. For each request, the value of the property you choose for Field is compared to the value you specify for Value using the operator selected in Operator.
Select the rule action from the Choose action drop-down list. For example, selecting Block tells Cloudflare to refuse requests in the conditions you specified when the request limit is reached.
(Optional) If you selected the Block action, you can configure a custom response for requests exceeding the configured rate limit.
Under For, select the mitigation timeout in Duration. This is the time period during which Cloudflare applies the select action once the rate is reached.
Under When rate exceeds, define the maximum number of requests and the time period to consider when determining the rate.
Under With the same value of, add one or more characteristics that will define the request counters for rate limiting purposes. Each value combination will have its own counter to determine the rate. Refer to Determining the rate for more information.
(Optional) Under Counter, enable Use custom counting expression to define an expression that specifies the conditions for incrementing the rate counter. By default, the counting expression is the same as the rule expression. The counting expression can include response fields.
(Optional) Under Cache status, disable Also apply rate limiting to cached assets to consider only the requests that reach the origin when determining the rate.
To save and deploy your rule, select Deploy. If you are not ready to deploy your rule, select Save as Draft.
Configuring a custom response for blocked requests
When you select the Block action in a rule you can optionally define a custom response.
The custom response has three settings:
Response type: Choose a content type or the default block response from the list. The available custom response types are the following:
Dashboard value API value Custom HTML "text/html"Custom Text "text/plain"Custom JSON "application/json"Custom XML "text/xml"Response code: Choose an HTTP status code for the response, in the range 400-499. The default response code is 403.
Response body: The body of the response. Configure a valid body according to the response type you selected.