Manage accounts
Each customer or team that uses Cloudflare should have their own account. This ensures proper security and access of resources. Each account acts as a container of zones and other resources. Depending on your needs, you may even provision multiple accounts for a single customer or team.
When you create an account with the Tenant API, your Cloudflare user owns that account from creation, ongoing management, and finally deletion.
Create account
Each customer or team that uses Cloudflare should have their own account. This ensures proper security and access of resources. Each account acts as a container of zones and other resources. Depending on your needs, you may even provision multiple accounts for a single customer or team.
When you create an account with the Tenant API, your Cloudflare user owns that account from creation, ongoing management, and finally deletion.
To create an account using the Cloudflare dashboard:
- Log into the dashboard.
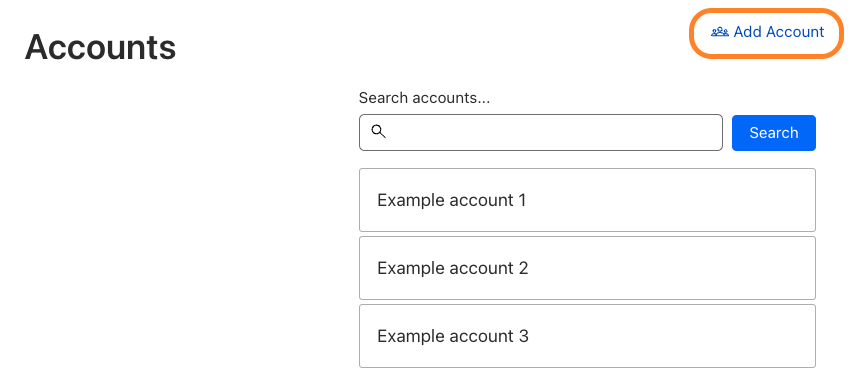
- On the Accounts page, select Add Account.

- Enter the Account Name and Account Description.
- Choose the Tenant Unit.
- Choose the appropriate account subscription.
- Select Add Account.
To create an account using the API, make a POST request to the /accounts endpoint and include the following values:
namestring- The name of the account that is displayed in the Cloudflare dashboard.
typeenum- Valid values are
standard(default) andenterprise. For self-serve customers, usestandard. For enterprise customers, useenterprise.
- Valid values are
unitobjectInformation related to the tenant unit
idstring- (optional) ID of the unit to create this account on. Needs to be specified if user administers multiple tenants. Unit ID is the
unit_tagfrom your tenant details.
- (optional) ID of the unit to create this account on. Needs to be specified if user administers multiple tenants. Unit ID is the
Requestcurl -X POST 'https://api.cloudflare.com/client/v4/accounts' \
-H 'Content-Type: application/json' \
-H 'x-auth-email: <EMAIL>' \
-H 'x-auth-key: <API_KEY>' \
-d '{    "name": "<ACCOUNT_NAME>",    "type": "standard"    }'
A successful request will return an HTTP status of 200 and the following response body:
Response{  "result": {    "id": "2bab6ace8c72ed3f09b9eca6db1396bb",    "name": "<Account Name>",    "type": "standard",    "settings": {      "enforce_twofactor": false    }  },  "success": true,  "errors": [],  "messages": []
}
A request with a unit ID:
Requestcurl -X POST 'https://api.cloudflare.com/client/v4/accounts' \
-H 'Content-Type: application/json' \
-H 'x-auth-email: <EMAIL>' \
-H 'x-auth-key: <API_KEY>' \
-d '{    "name": "<ACCOUNT_NAME>",    "type": "standard",    "unit": {      "id": "1a2b3c4d5e6f7g8h",    }    }'
Fetch account
When you create an account with the Tenant API, your Cloudflare user owns that account from creation, ongoing management, and finally deletion.
To view any accounts owned by your Cloudflare user, send a GET request to the /accounts endpoint.
You will get back a list of all the accounts you have created plus any accounts your user already had access to.
Requestcurl -X GET https://api.cloudflare.com/client/v4/accounts \
-H 'x-auth-email: <EMAIL>' \
-H 'x-auth-key: <API_KEY>' \
Response{  "result": [    {      "id": "a34bd6cc645a31486aa2ef71f1b9afb6",      "name": "My Personal Account",      "settings": {        "enforce_twofactor": false      }    },    {      "id": "1b16db169c9cb7853009857198fae1b9",      "name": "Created Account",      "settings": {        "enforce_twofactor": false      }    }  ],  "result_info": {    "page": 1,    "per_page": 20,    "total_pages": 1,    "count": 2,    "total_count": 2  },  "success": true,  "errors": [],  "messages": []
}
Update account
To update an account, send a PUT request to the /accounts/<ACCOUNT_ID> endpoint.
Delete account
To delete an account you have created, send a DELETE request to the /accounts/<ACCOUNT_ID> endpoint.
Account deletion is permanent and will delete any zones or other resources under the account.
Requestcurl -X DELETE https://api.cloudflare.com/client/v4/accounts/<ACCOUNT_ID> \
-H 'x-auth-email: <EMAIL>' \
-H 'x-auth-key: <API_KEY>' \
A successful request will return the id to confirm the operation:
Response{  "result": {    "id": "1b16db169c9cb7853009857198fae1b9"  },  "success": true,  "errors": [],  "messages": []
}