Deploy and configure Area 1 with with Cisco as MX record

In this tutorial, you will learn how to configure Area 1 email security with Cisco as MX record. This tutorial is broken down into several steps.
1. Add a Sender Group for Area 1 Email Protection IPs
To add a new Sender Group:
Go to Mail Policies > HAT Overview.
Select the Add Sender Group button.
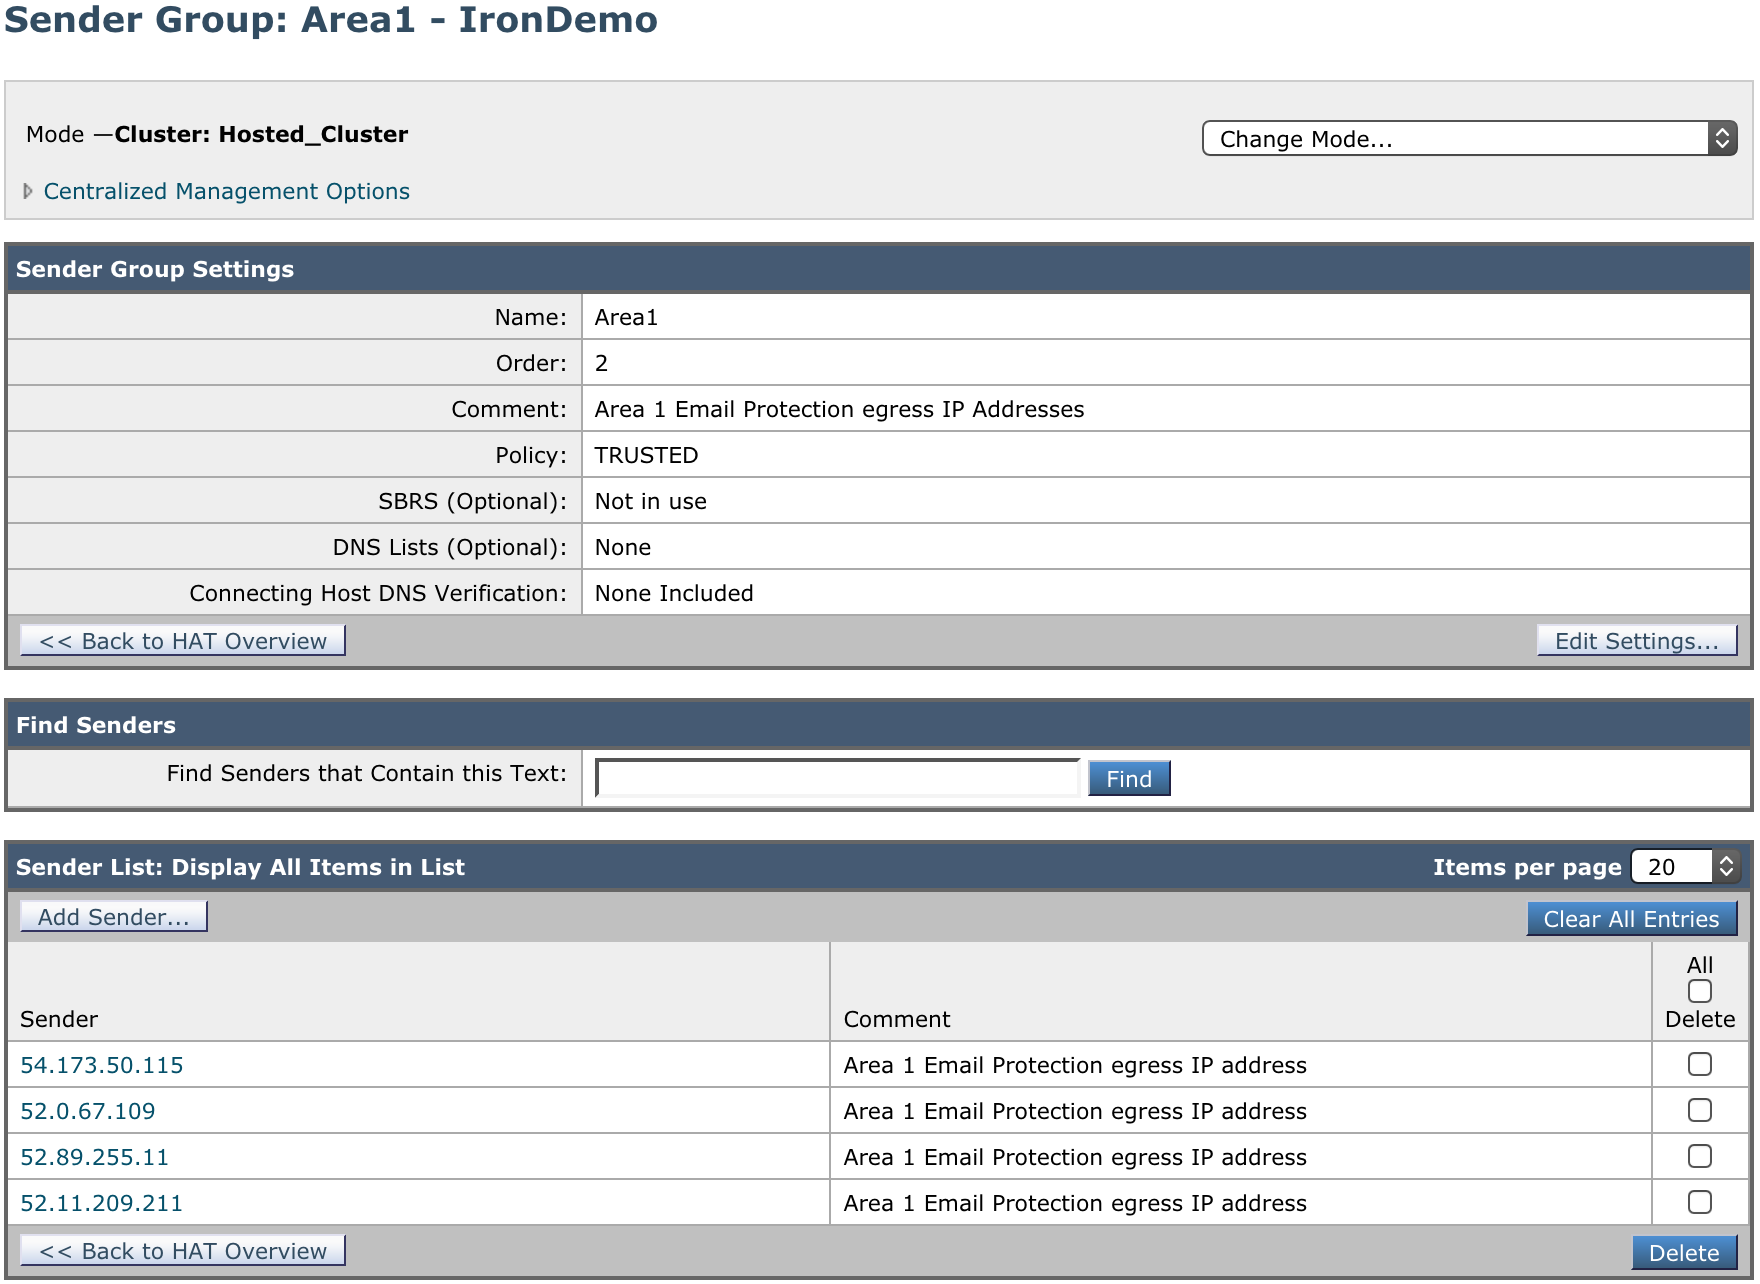
Configure the new Sender Group as follows:
- Name:
Area1. - Order: Order above the existing WHITELIST sender group.
- Comment:
Area 1 Email Protection egress IP Addresses. - Policy:
TRUSTED(by default, spam detection is disabled for this mail flow policy). - SBRS: Leave blank.
- DNS Lists: Leave blank.
- Connecting Host DNS Verification: Leave all options unchecked.
- Name:
Select Submit and Add Senders and add the IP addresses mentioned in Egress IPs.
2. Add SMTP route for the Area 1 Email Protection Hosts
To add a new SMTP Route:
Go to Network > SMTP Routes.
Select Add Route.
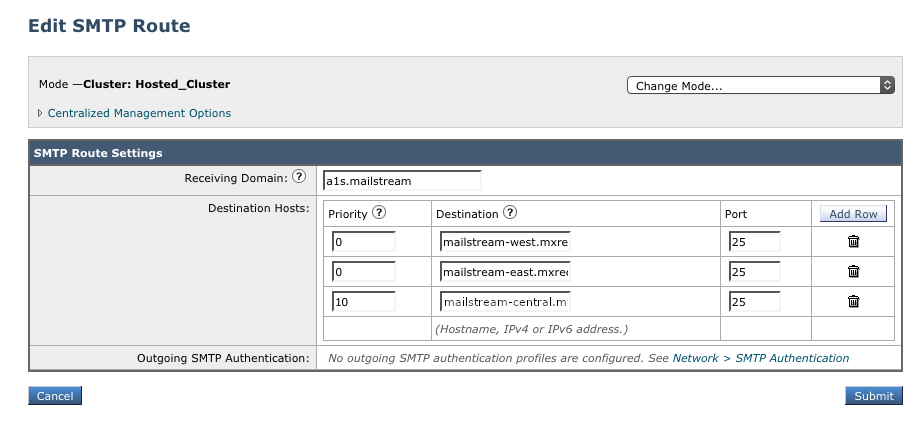
Configure the new SMTP Route as follows:
- Receiving Domain:
a1s.mailstream - In Destination Hosts, select Add Row, and add the following values to the respective rows:
Priority Destination Port 5mailstream-central.mxrecord.mx2510mailstream-east.mxrecord.io2510mailstream-west.mxrecord.io25
- Receiving Domain:
3. Create Incoming Content Filters
To manage the mail flow between Area 1 and Cisco ESA, you need two filters:
- One to direct all incoming messages to Area 1.
- One to recognize messages coming back from Area 1 to route for normal delivery.
Incoming Content Filter - To Area 1
To create a new Content Filter:
Go to Mail Policies > Incoming Content Filters.
Select Add Filter to create a new filter.
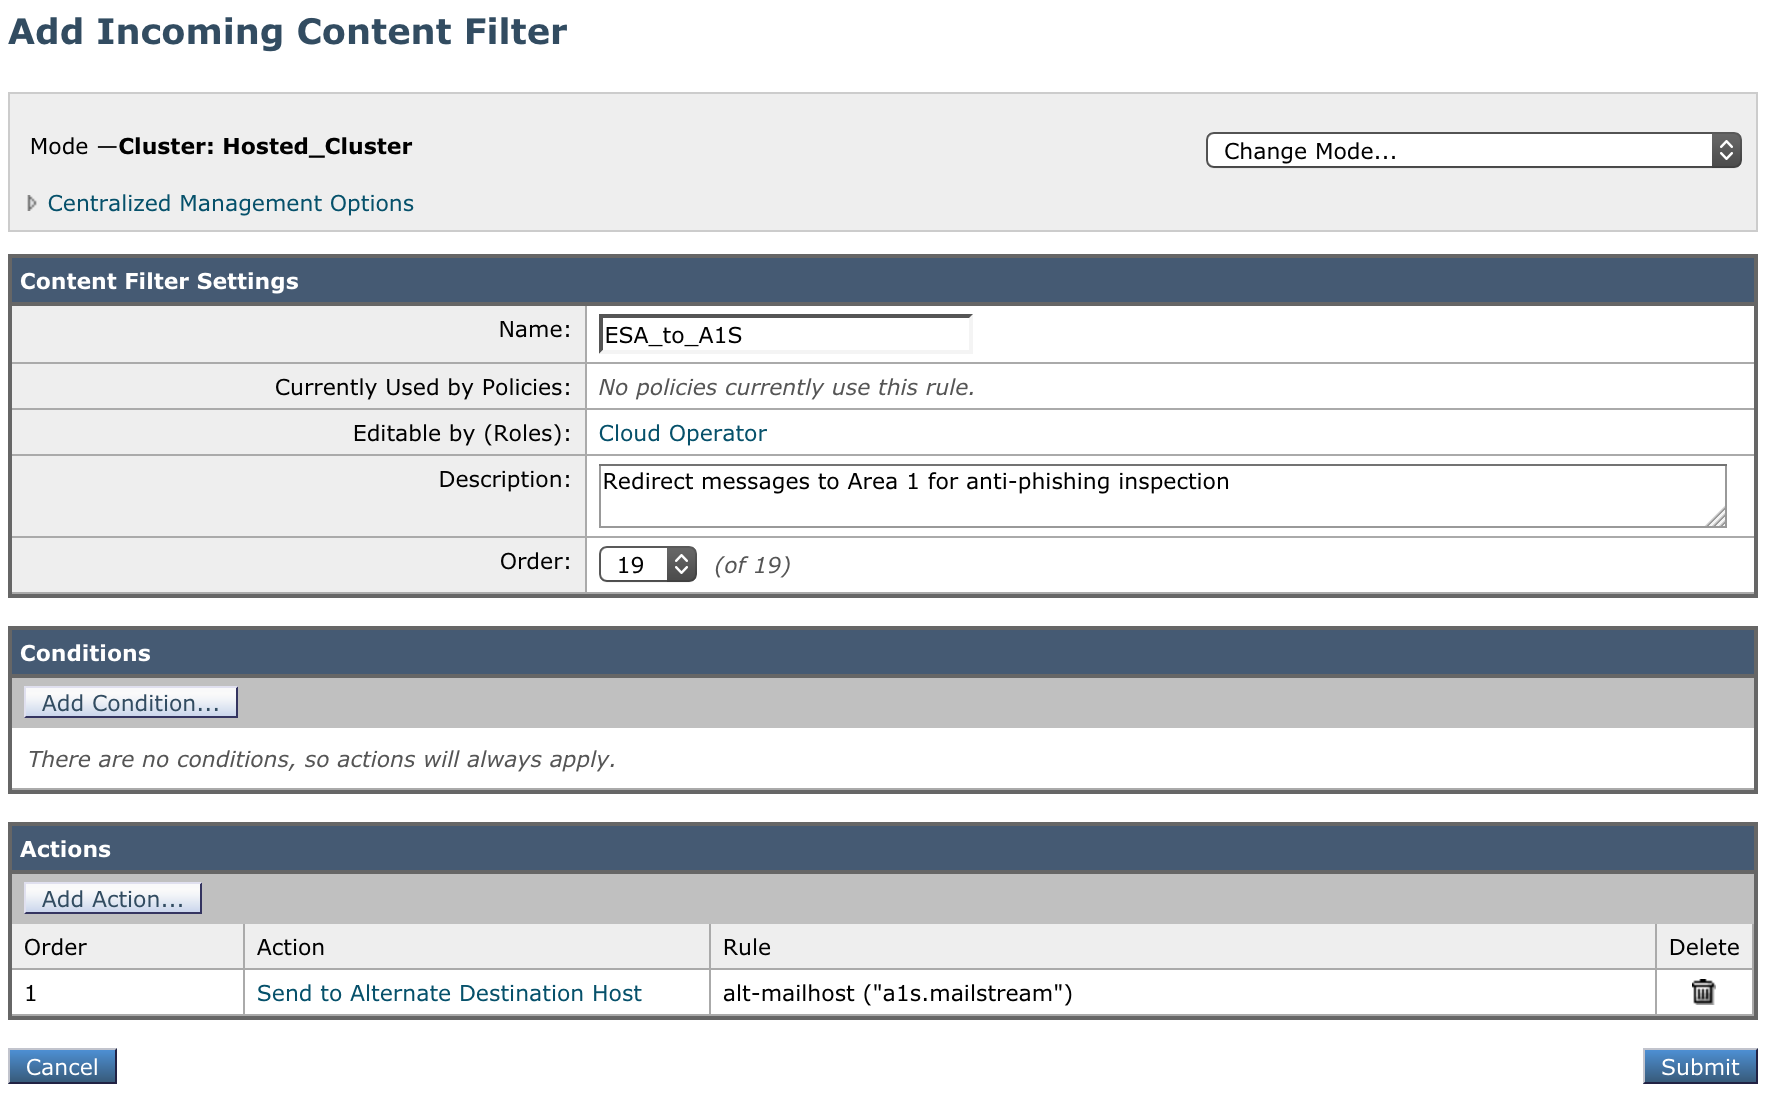
Configure the new Incoming Content Filter as follows:
- Name:
ESA_to_A1S - Description:
Redirect messages to Area 1 for anti-phishing inspection - Order: This will depend on your other filters.
- Condition: No conditions.
- Actions:
- For Action select Send to Alternate Destination Host.
- For Mail Host input
a1s.mailstream(the SMTP route configured in step 2).
- Name:
Incoming Content Filter - From Area 1
To create a new Content Filter:
Go to Mail Policies > Incoming Content Filters.
Select the Add Filter button to create a new filter.
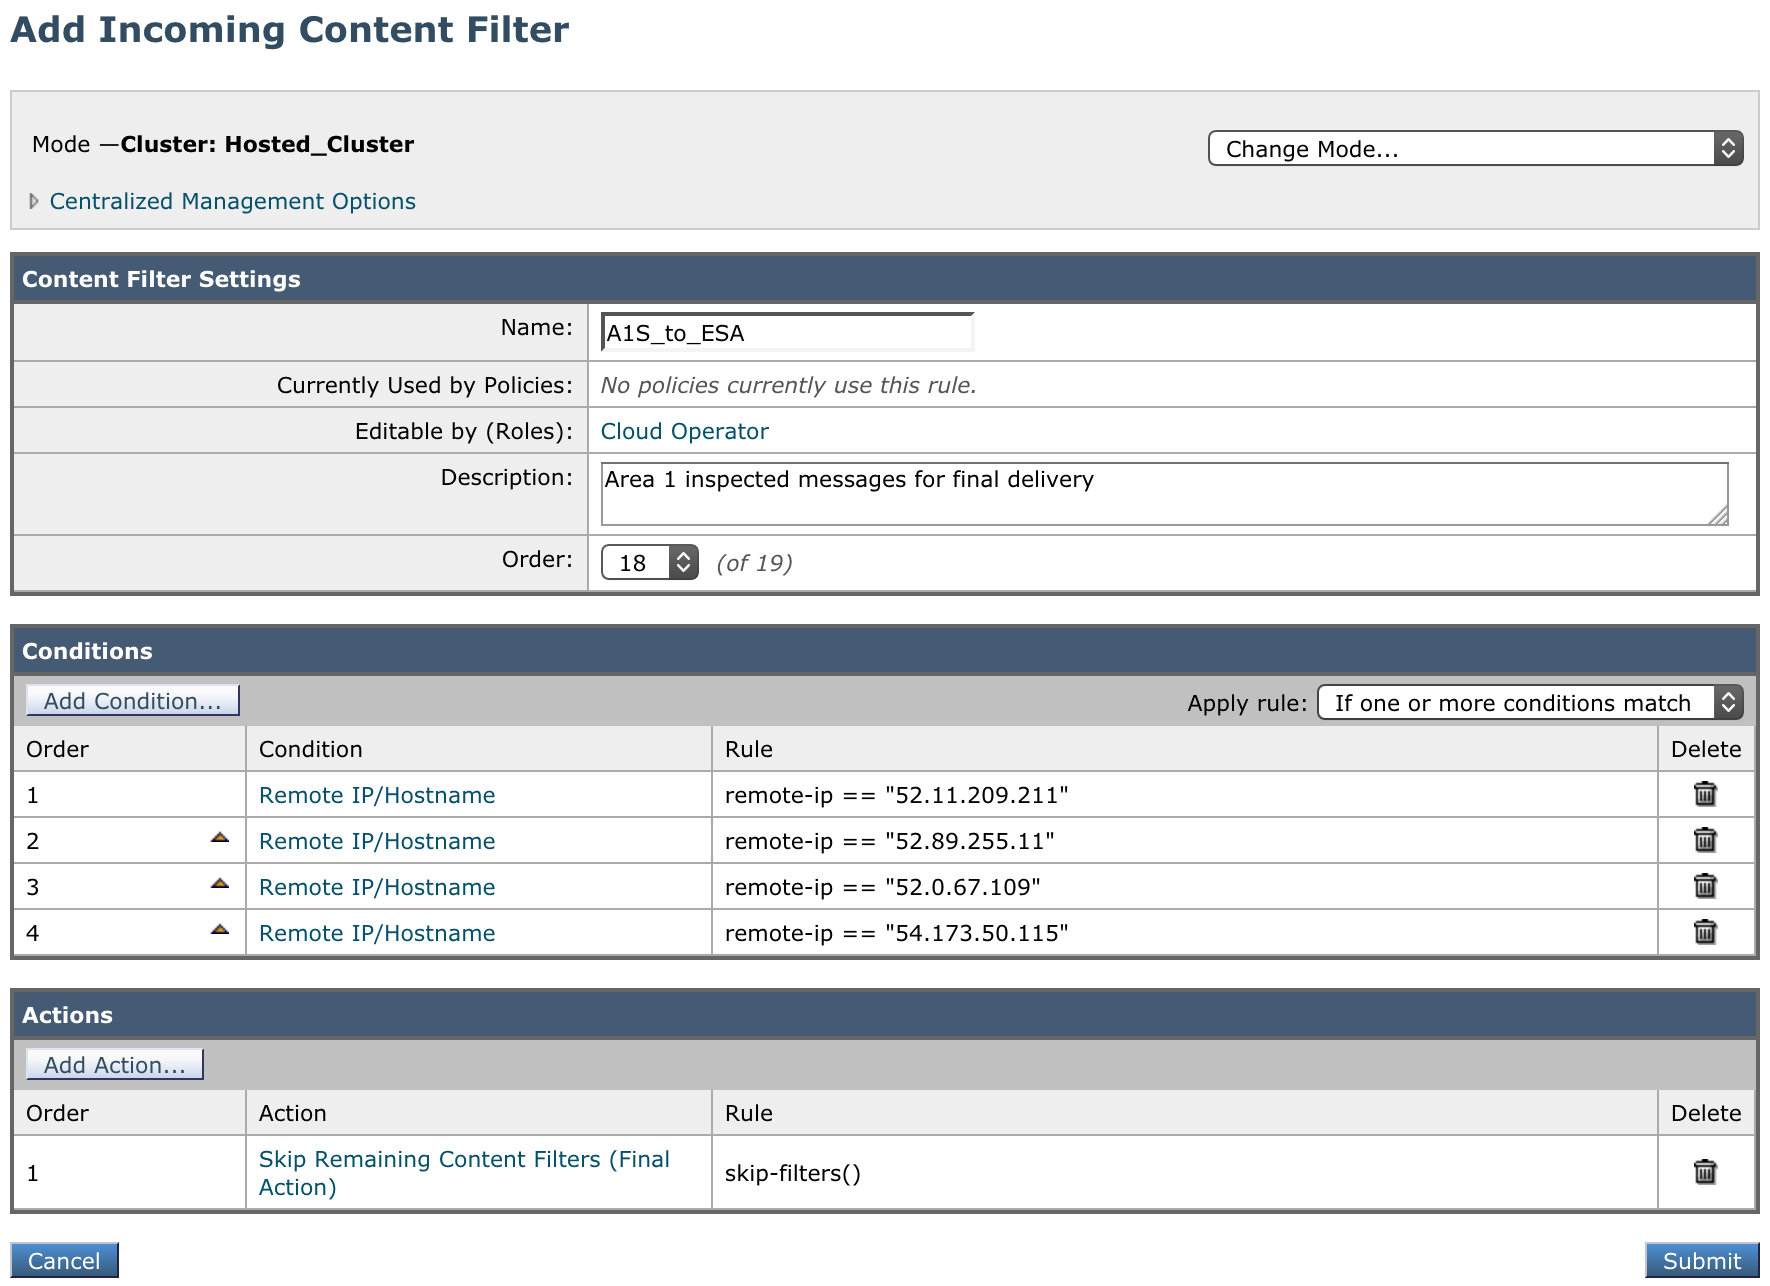
Configure the new Incoming Content Filter as follows:
- Name:
A1S_to_ESA - Description:
Area 1 inspected messages for final delivery - Order: This filter must come before the previously created filter.
- Conditions: Add seven conditions of type Remote IP/Hostname with the IP addresses mentioned in Egress IPs:
Order Condition Rule 1Remote IP/Hostname52.11.209.2112Remote IP/Hostname52.89.255.113Remote IP/Hostname52.0.67.1094Remote IP/Hostname54.173.50.1155Remote IP/Hostname104.30.32.0/196Remote IP/Hostname158.51.64.0/267Remote IP/Hostname158.51.65.0/26- Ensure that the Apply rule: dropdown is set to If one or more conditions match.
- Actions: Select Add Action, and add the following:
Order Action Rule 1 Skip Remaining Content Filters (Final Action)skip-filters()
- Name:
4. Add the Incoming Content Filter to the Inbound Policy table
Assign the Incoming Content Filters created in step 3 to your primary mail policy in the Incoming Mail Policy table. Then, commit your changes to activate the email redirection.