Gmail BCC setup with Area 1
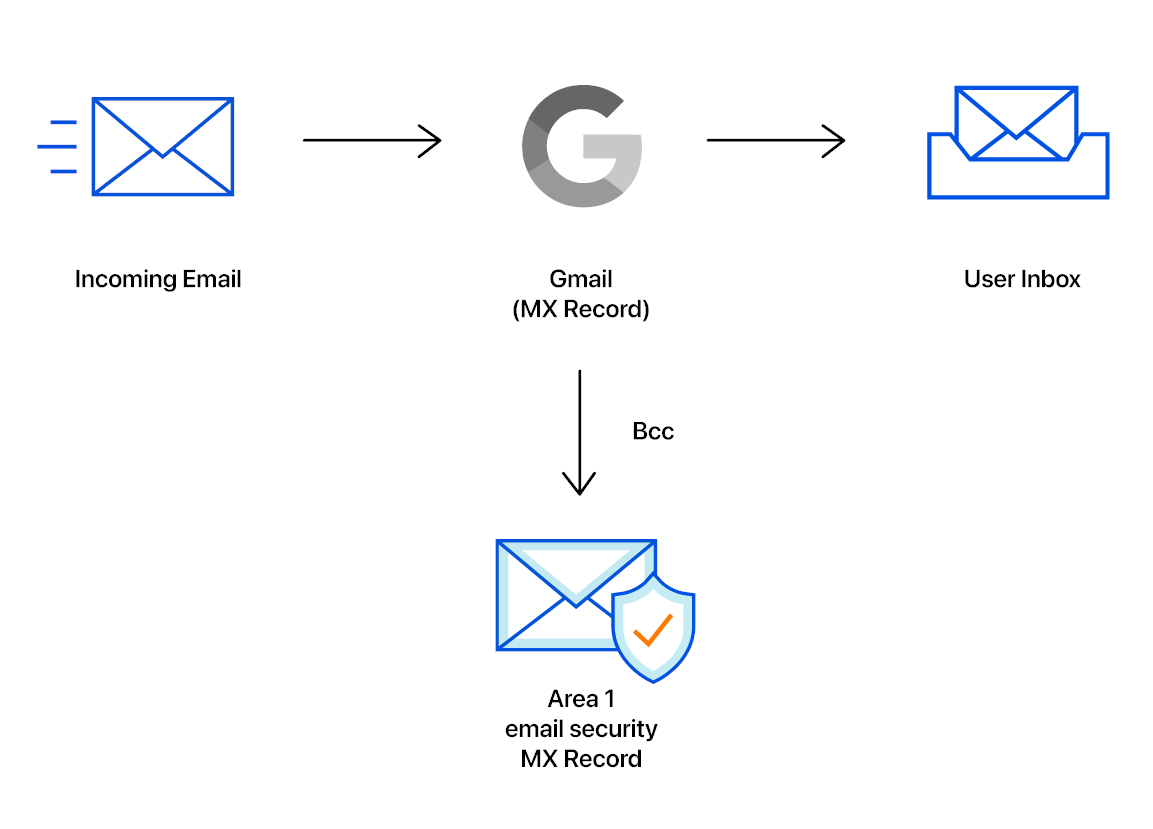
For customers using Gmail, setting up Area 1 via BCC is quick and easy. All you need to do is create a content compliance filter to send emails to Area 1 through BCC. The following email flow shows how this works:
To setup Area 1 phishing risk assessment for Gmail:
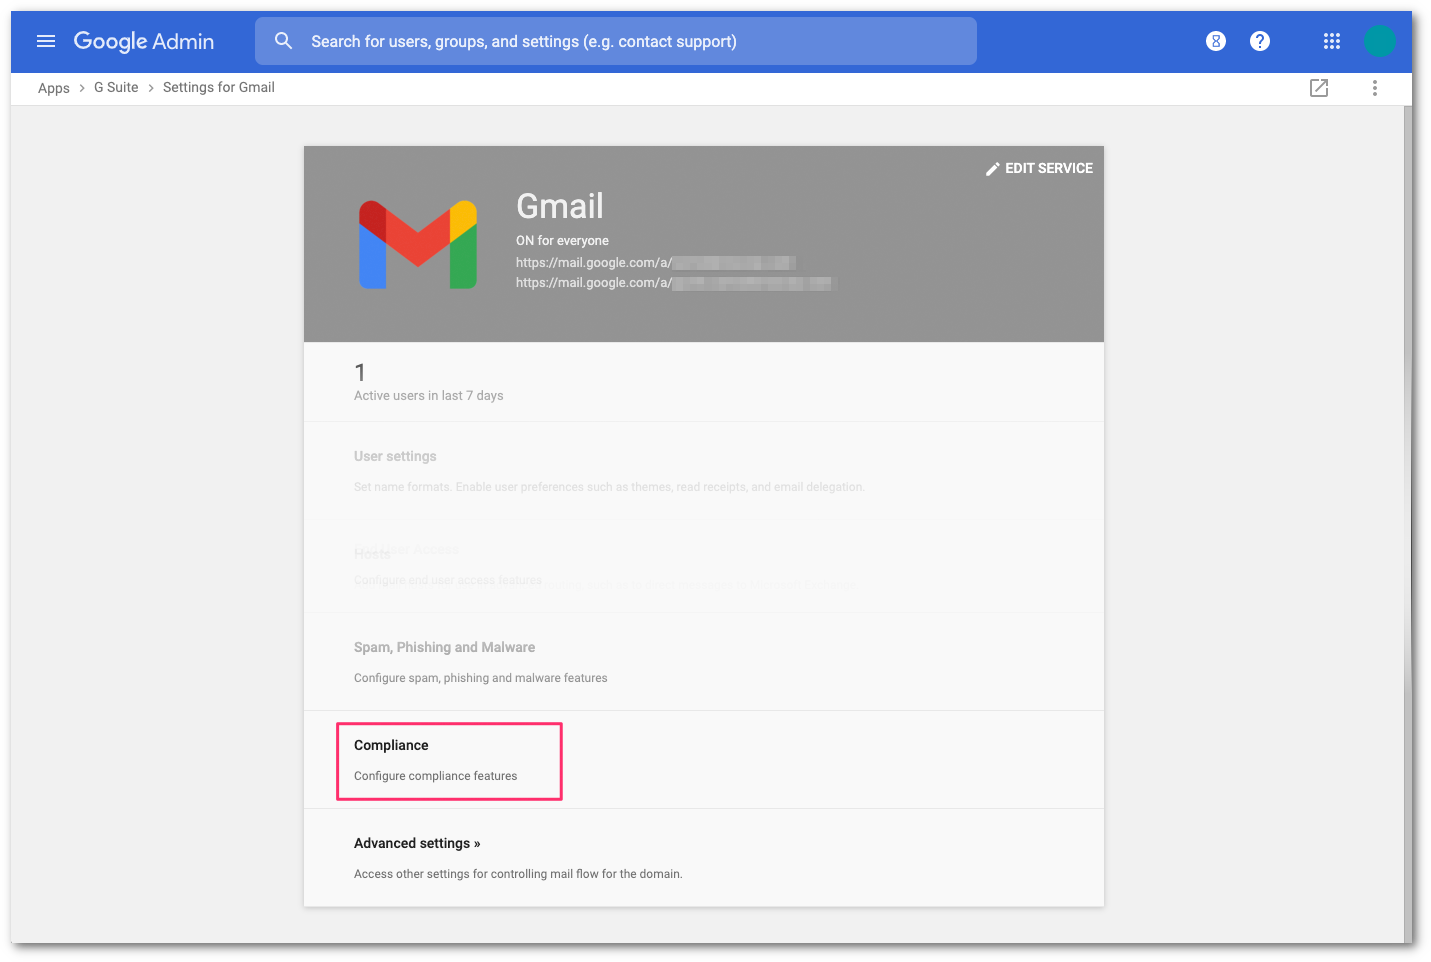
In the Admin console, go to Menu > Apps > Google Workspace > Gmail > Compliance.
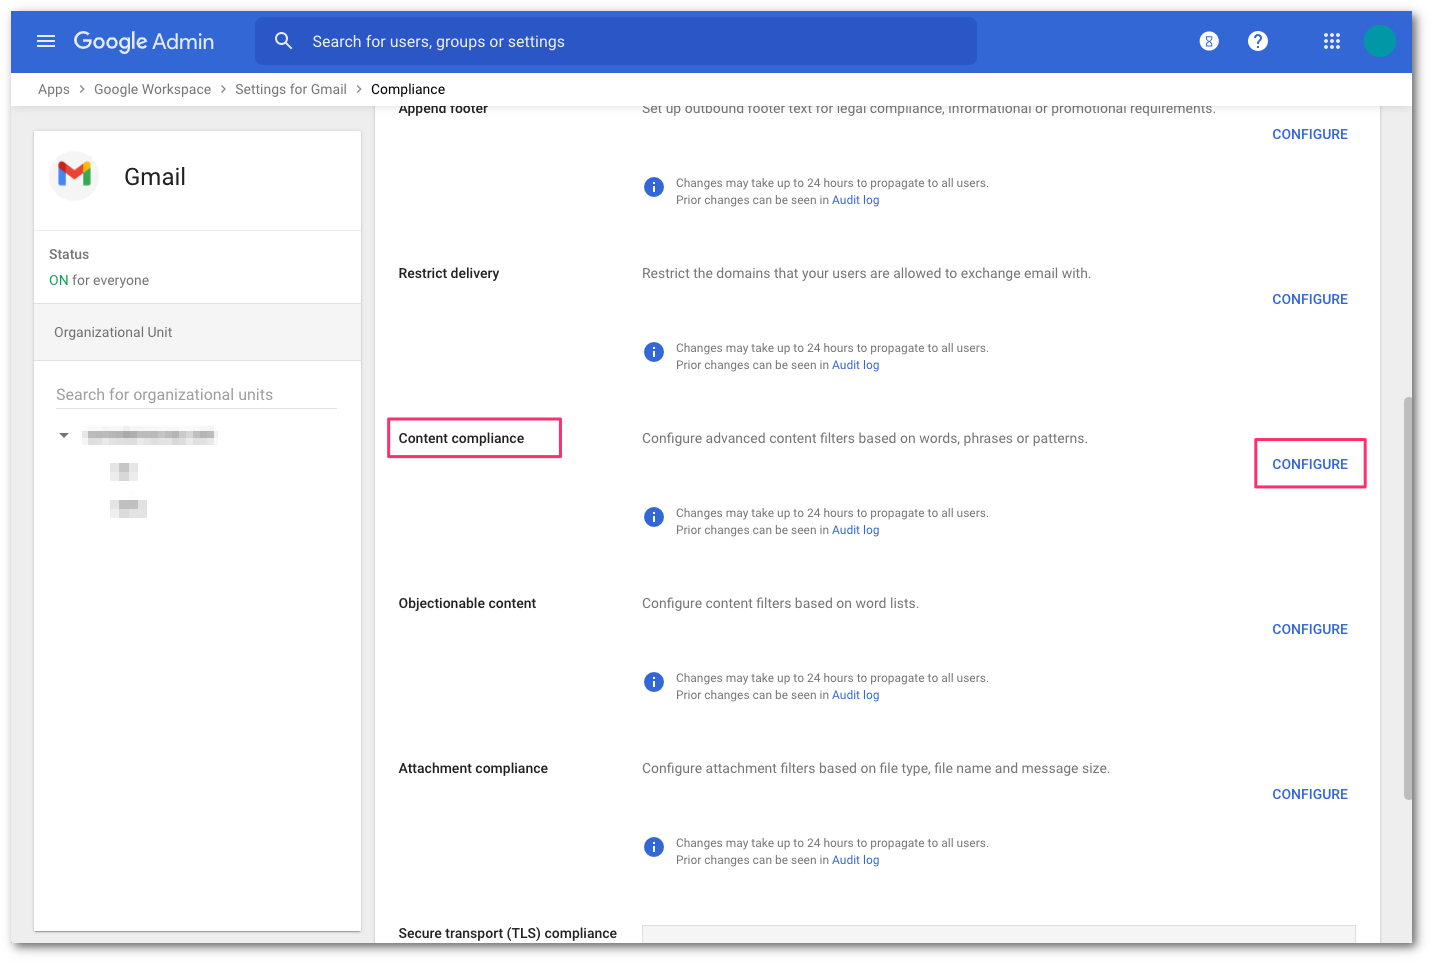
Scroll to Content Compliance and select CONFIGURE.
Add a Content Compliance filter and name it
Area 1 - BCC.In Email messages to affect, select Inbound.
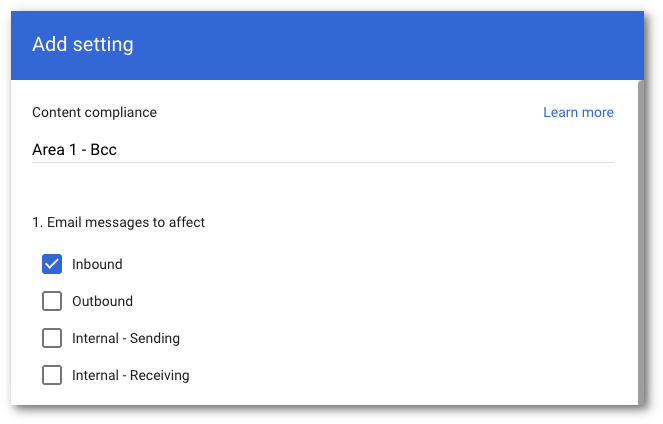
Select the recipients that you want to send emails to Area 1 via BCC:
- Select Add to configure the expression.
- Select Advanced content match.
- In Location, select Headers + Body from the dropdown.
- In Match type select Matches regex.
- In Regexp input
.*. You can customize the regex as needed and test within the admin page or on sites like https://regexr.com/. - Select SAVE.
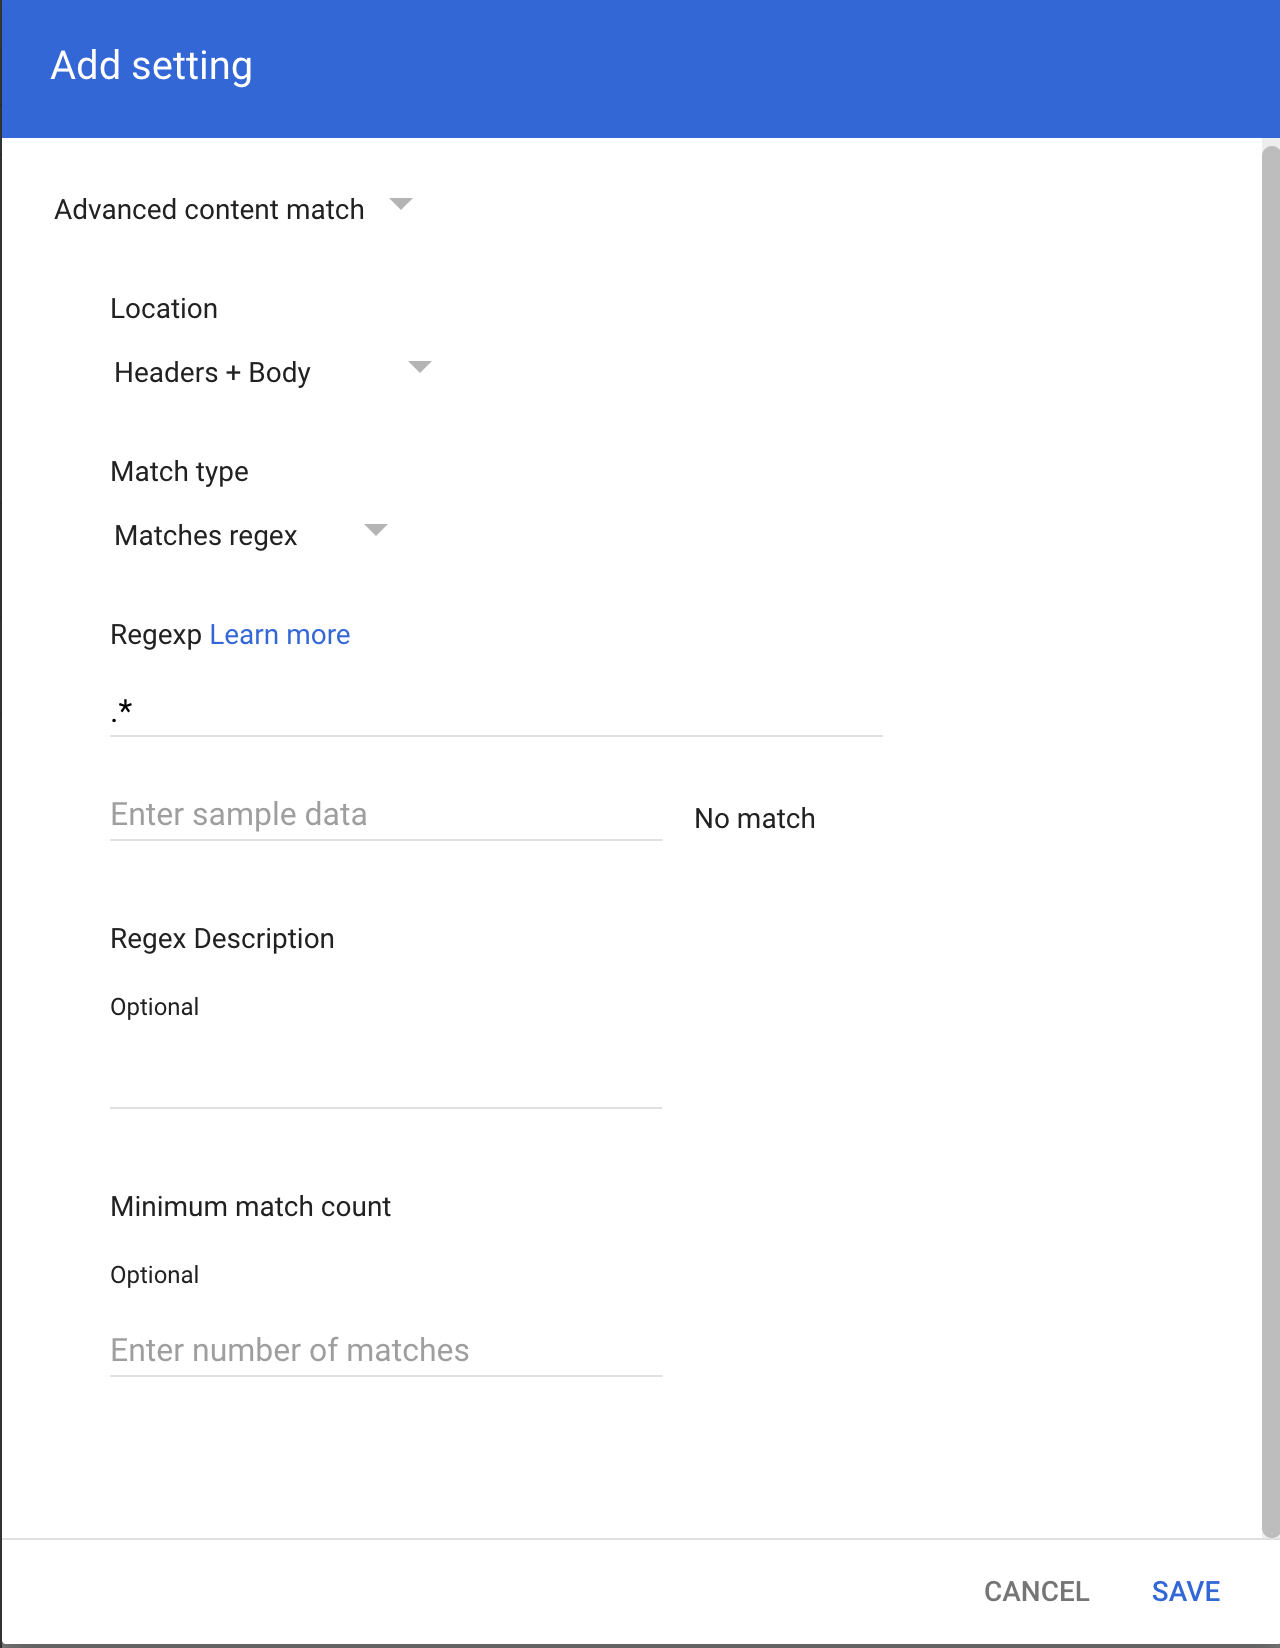
In If the above expressions match, do the following, make the following changes:
In Also deliver to select Add more recipients.
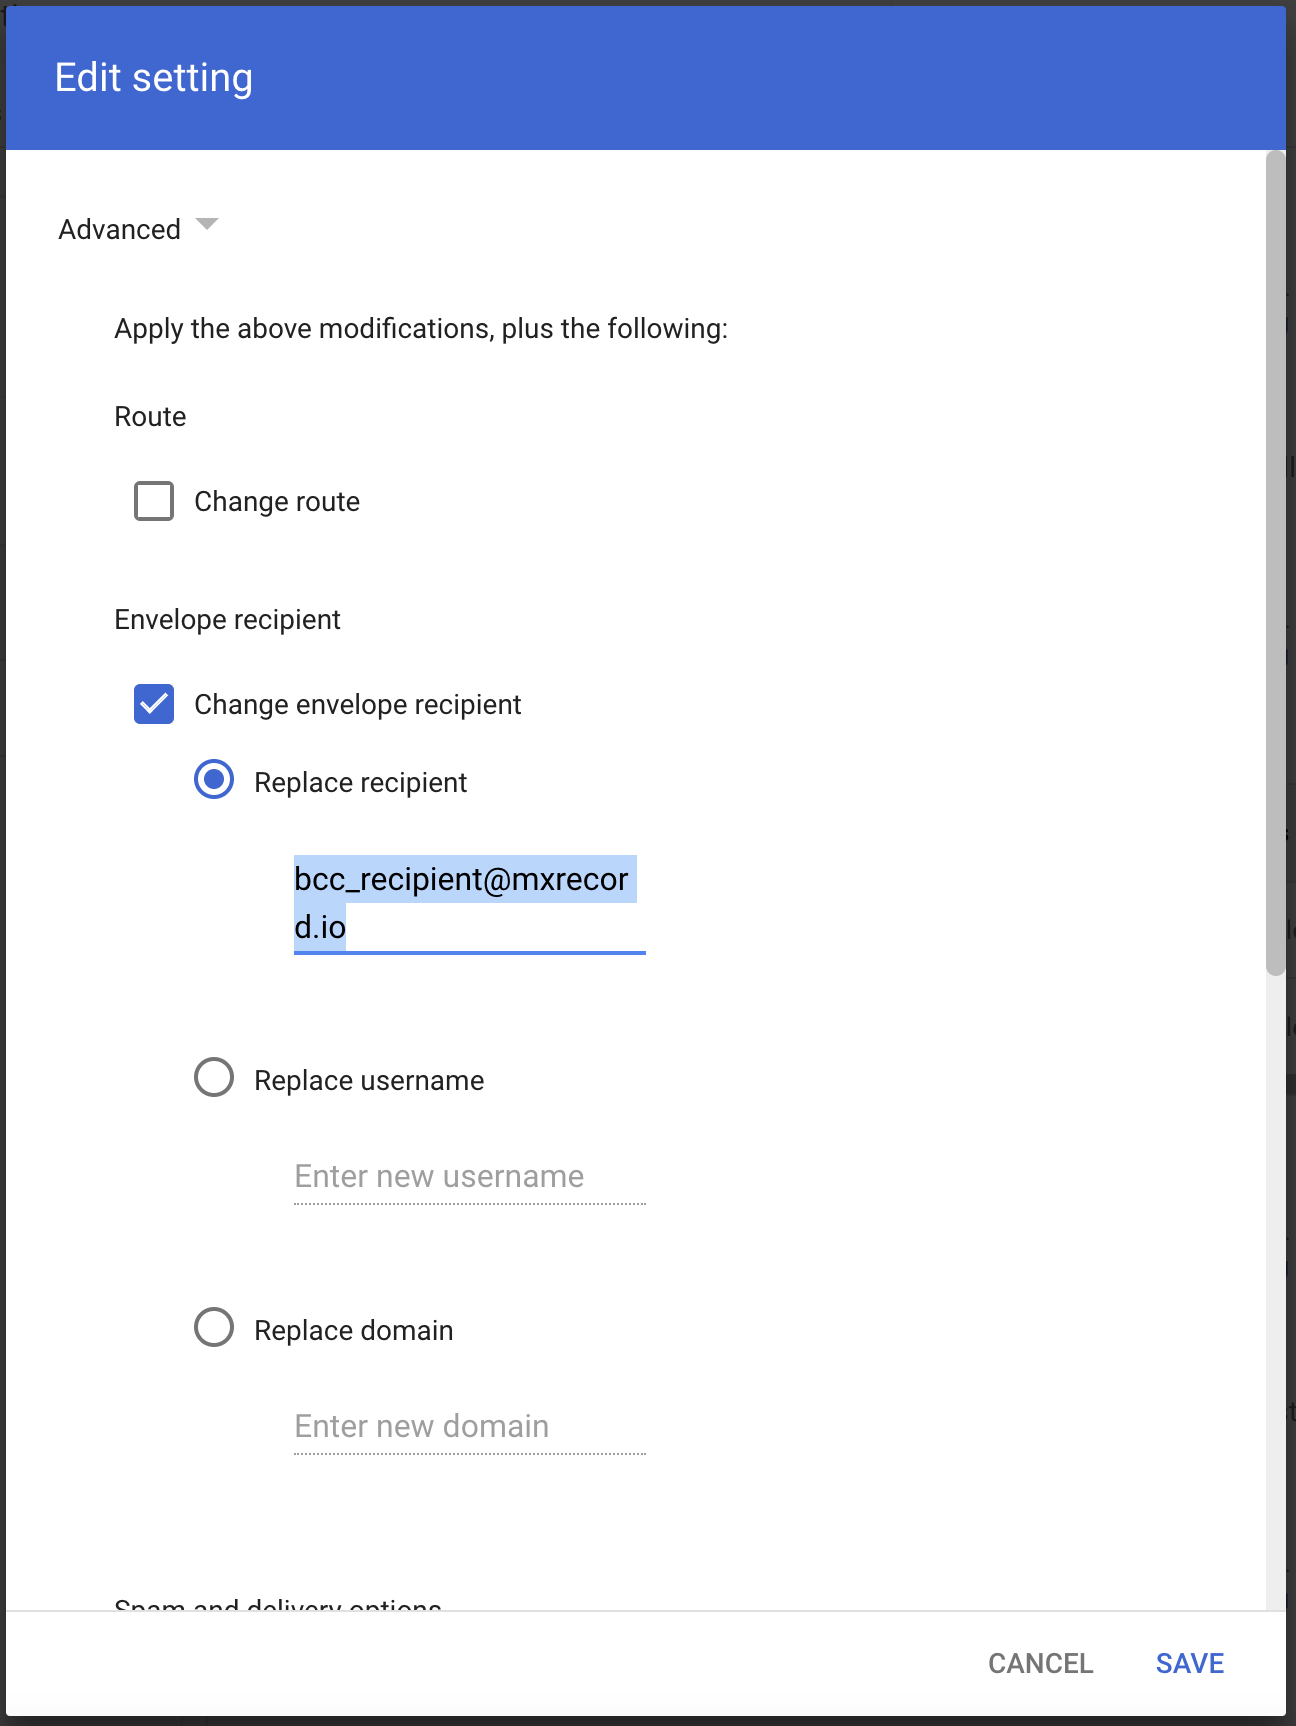
- Under Recipients select Add.
- Change the setting to Advanced.
- In Envelope recipient select Change envelope recipient.
- In Replace recipient add the recipient BCC address. For example,
bcc_recipient@mxrecord.io. This address is specific to each customer tenant and can be found in your Portal.
- Make sure that in Spam and delivery options > Do not deliver spam to this recipient is not checked.
- Under Headers select Add X-Gm-Spam and X-Gm-Phishy headers.
- Select SAVE.
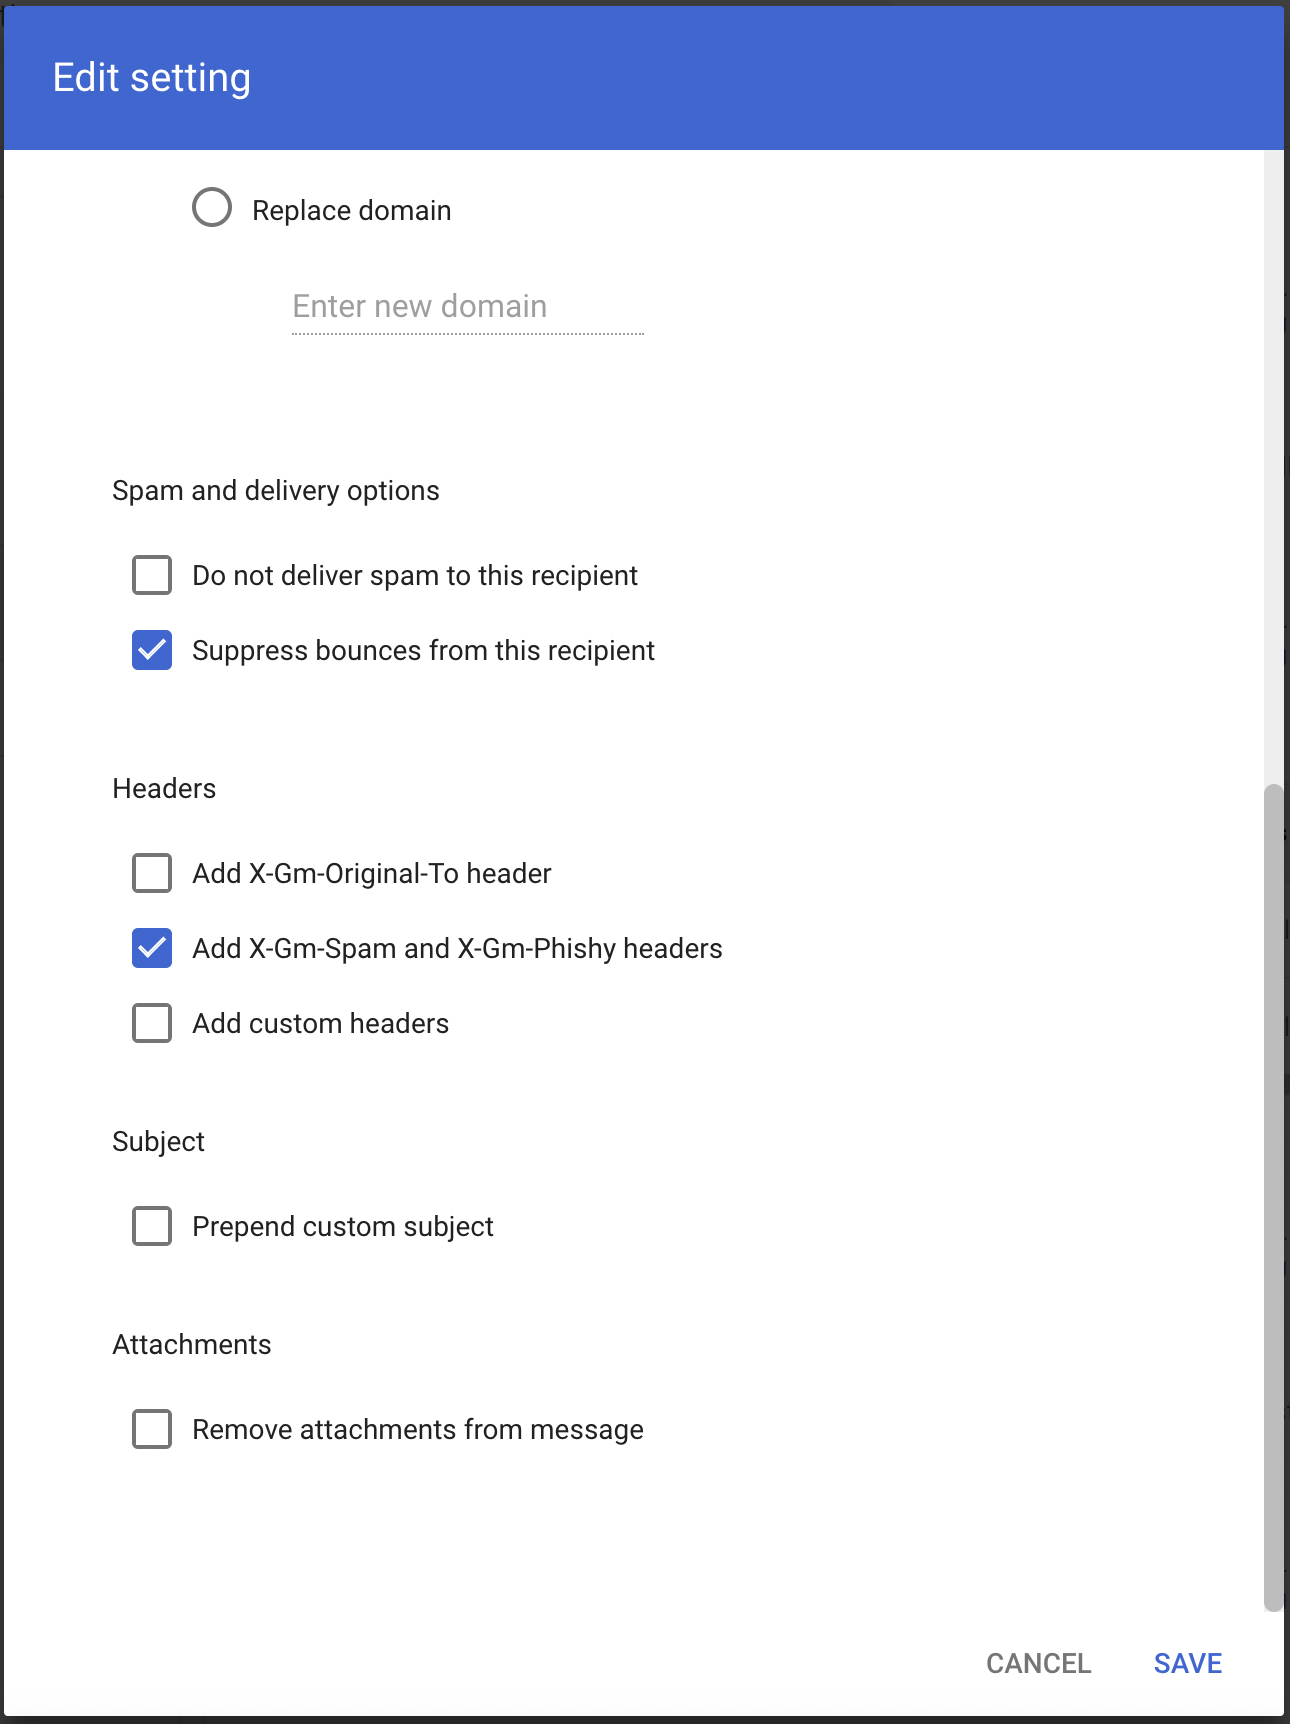
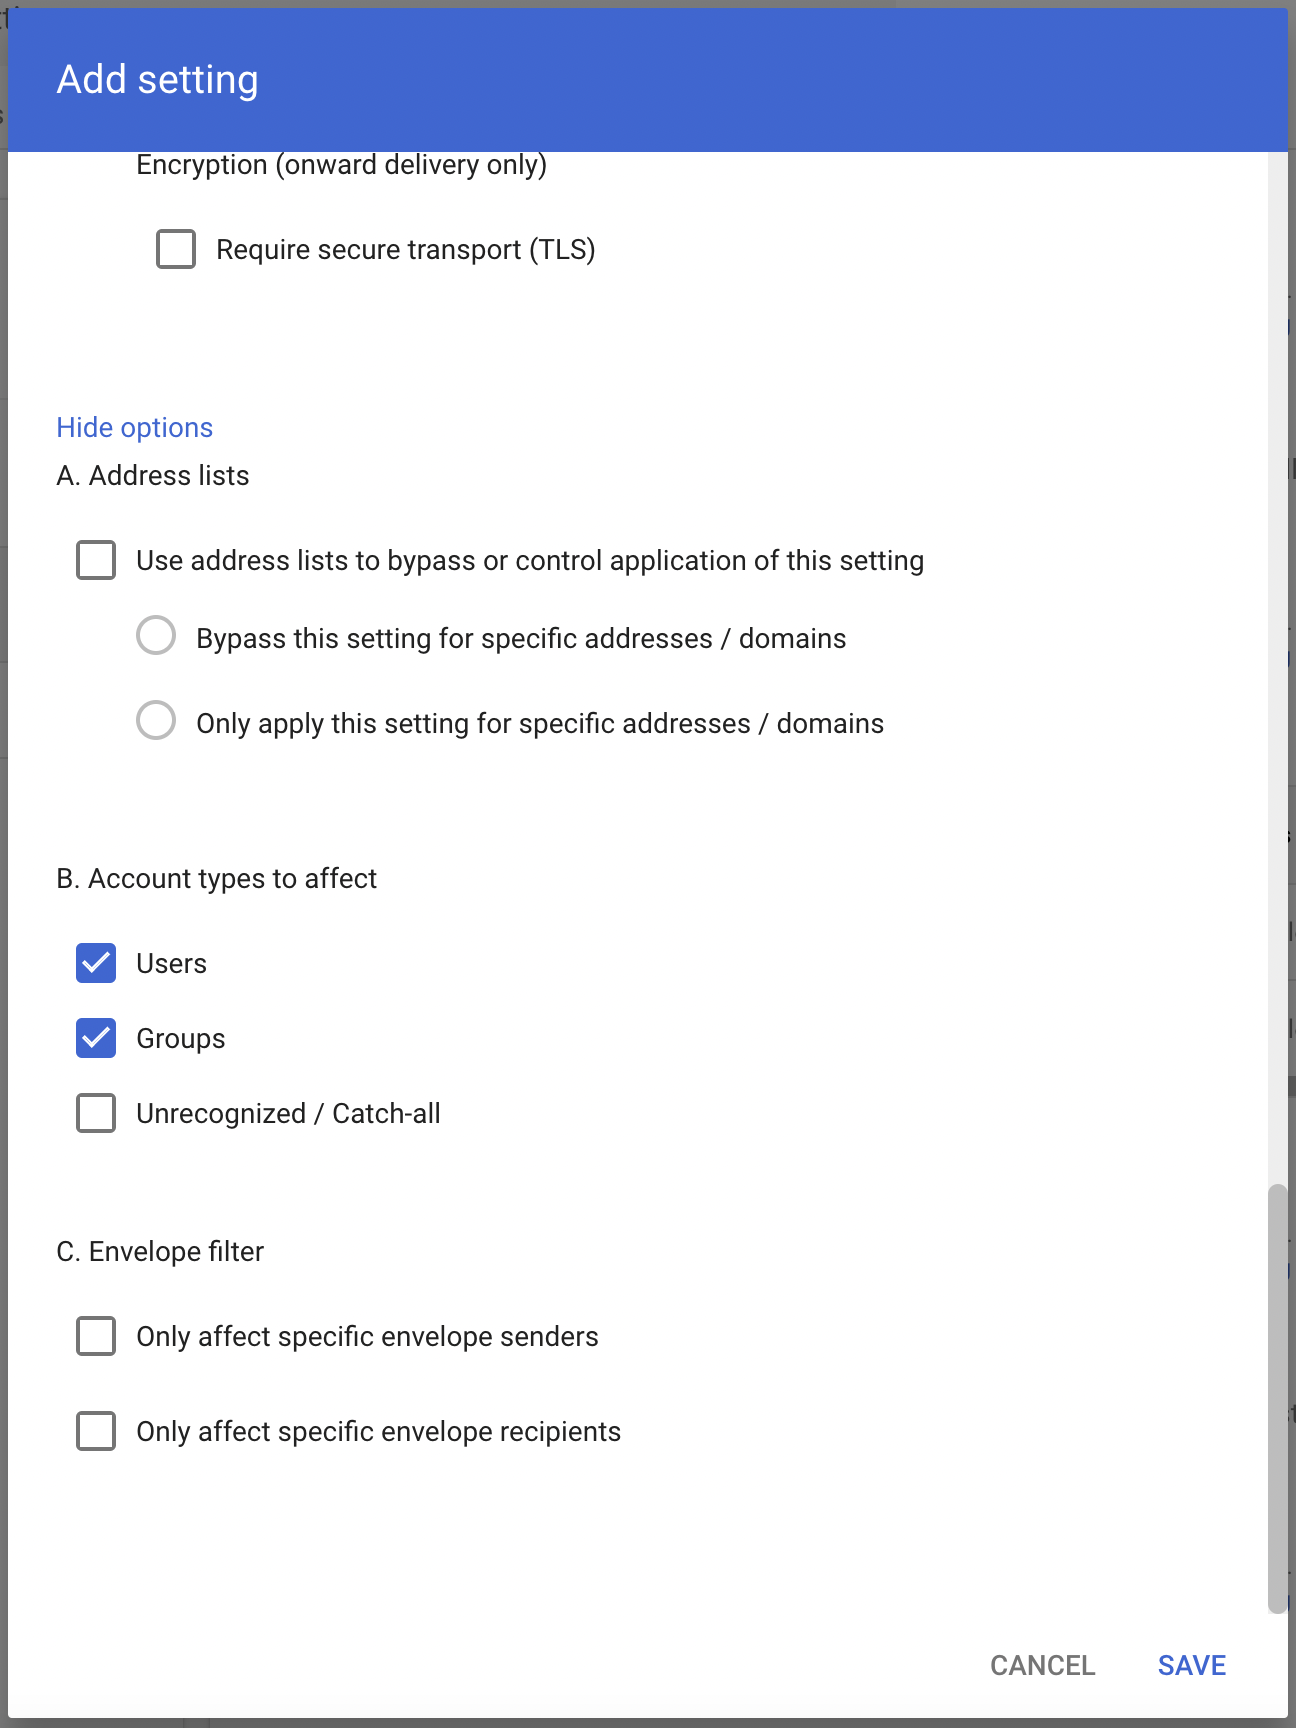
Scroll down and select Show options.
- Under Account types to affect select Groups.
- Select SAVE.
