Require Gateway connections
You can build rules in Cloudflare Access that require users to connect through your organization’s Cloudflare Gateway configuration before they reach on-premise applications or login to SaaS applications.
This tutorial covers how to:
- Add Cloudflare Gateway to your Zero Trust account
- Enroll devices in Cloudflare Gateway
- View enrolled devices
- Build a rule in Access to require Cloudflare Gateway
Time to complete:
40 minutes
Add Cloudflare Gateway
Cloudflare Gateway operates in two modes:
- DNS filtering
- Proxy (HTTP filtering)
The proxy mode in Gateway requires a Gateway Standard or Cloudflare Zero Trust Standard plan.
To filter all Internet-bound traffic in the proxy mode, devices must install and enroll the Zero Trust WARP client. The WARP client will send all Internet traffic to a Cloudflare data center near the user where it can be filtered and logged before reaching the rest of the Internet.
Building a rule in Access to enforce Gateway connections requires the use of the WARP client and its configuration to proxy Internet traffic to Cloudflare.
Determine which devices can enroll
Next, build a rule to decide which devices can enroll in your account.
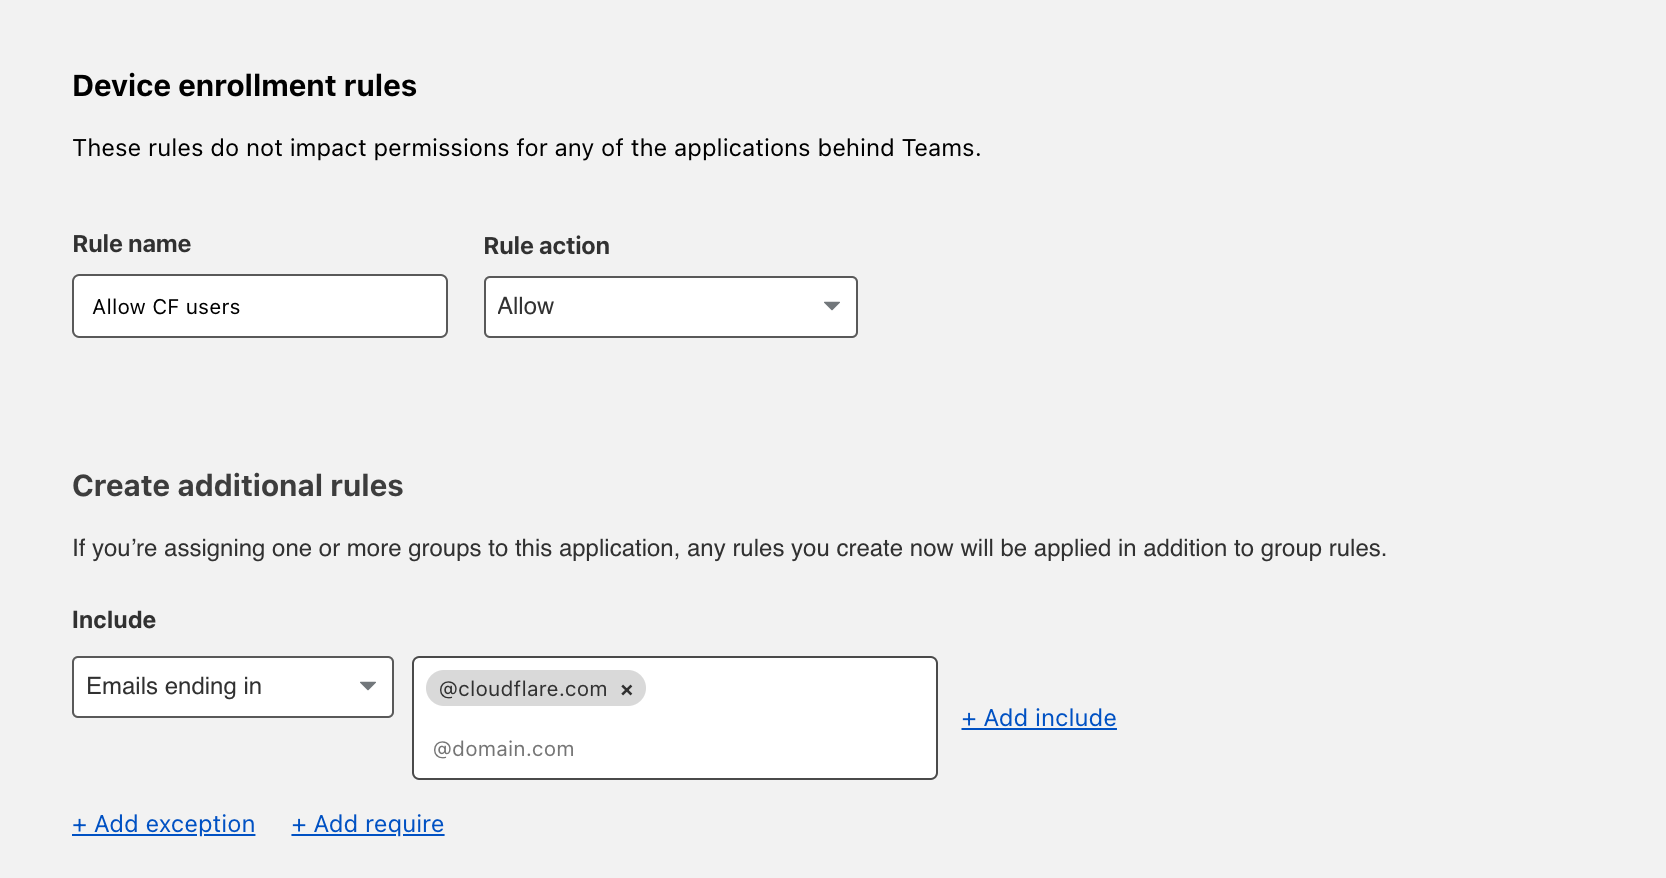
Navigate to Settings > WARP Client > Device enrollment.
Click Manage.
Click Add a rule.
Determine who is allowed to enroll by using criteria including Access groups, groups from your identity provider, email domain, or named users. This example allows any user with a
@cloudflare.comaccount to enroll.
Click Save.
Your rule will now be visible under the Device enrollment rules list.
Configure the Cloudflare certificate
To inspect traffic, Cloudflare Gateway requires that a certificate be installed on enrolled devices. You can also distribute this certificate through an MDM provider. The example below describes the manual distribution flow.
To download the Cloudflare certificate:
- Follow the link provided in these instructions.
- Find the certificate in Zero Trust, by navigating to Settings > Downloads > Certificates.
Enable the Cloudflare proxy
Once the certificate has been installed, you can configure Gateway to inspect HTTP traffic. To do so, navigate to Settings > Network. Toggle Proxy to Enabled. This will tell Cloudflare to begin proxying any traffic from enrolled devices, except the traffic excluded using the split tunnel settings.
Next, enable TLS decryption. This will tell Cloudflare to begin decrypting traffic for inspection from enrolled devices, except the traffic excluded from inspection.
Enroll a device
Follow the instructions to install the WARP client depending on your device type. Cloudflare Gateway does not need a special version of the client.
Once the client is installed, click the gear icon.
Under the Account tab, click Login with Cloudflare Zero Trust.
Input your team name. You can find it in Zero Trust under Settings > General.
The user will be prompted to login with the identity provider configured in Cloudflare Access. Once authenticated, the client will update to
Teamsmode. You can click the gear to toggle between DNS filtering or full proxy. In this use case, you must toggle toGateway with WARP. These settings can be configured globally for an organization through a device management platform.
Build a device posture rule
You can now build rules in Cloudflare Access applications that require users connecting to those applications do so through Cloudflare Gateway. This can help protect your applications by only allowing devices which are blocked from reaching malware on the Internet. Additionally, you can ensure that you do not miss logs of SaaS application activity by requiring users who login to those SaaS applications only do so through Cloudflare Gateway.
To add a Require Gateway rule:
- Navigate to My Team > Devices.
- In the Device posture tab, click + Add in the WARP client checks card.
- Select
Gatewayfrom the options listed. - Click Save on the next screen.
You can now build rules with your organization’s Cloudflare Gateway configuration.
Build an Access policy
To build Access policies that require Gateway:
Navigate to Access> Applications.
Edit an existing application or add a new one.
In the application of your choice, edit an existing rule or add a new one.
In the rule builder view, click + Add require and select
Gatewayfrom both drop-down menus.Save the rule and the application.
Requests and logins to the application will now require the user to go through Cloudflare Gateway.
You can avoid adding the Require Gateway rule to each application manually by creating an Access Group which includes the Require rule, similar to the configuration of country rules. Add that Access Group to applications and the Gateway requirement will be enforced.